Tuesday, October 21, 2014

Weekly Deals


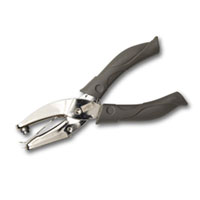
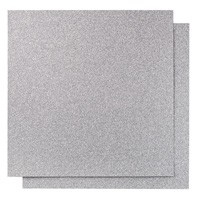
It's time again......every Tuesday Stampin' Up! offers some really great deals.  They change every week though, so don't miss out.

Go to my website here to order.

Easy to Make Luminary

While at Camp One Way, one of my sister demonstrators showed us how easy it is to make these cute table top decorations.  Here is the first one I made, following her instructions.  I'm showing both sides.  I had a LOT of retired Halloween product, so decided to use them on my "practice run".  I think it turned out really cute.


If you'd like to try one yourself, keep reading.  I have step-by-step instructions below.  Please note that I've used Real Red Cardstock in the illustrations; I plan to make a "Christmas" luminary, which I will show you in a later post.

1.  Cut a piece of cardstock to 9" x 12".  You need to use cardstock for the weight because paper will not hold the shape when completed.  On the short side (the 9" side), score at 4 1/2".   I've placed the marker at the 4 1/2" mark.


2.  On the long side, score at 3", 6", and 9".  You hopefully can see that I've also indicated these measurements with the little markers.


3.  Fold on all the score lines - really well.  You will be glad you did as you proceed with your project.  I use my trusty bone folder for this step.


4.  Fold "hamburger" style, and while folded,  cut on the center score line from the fold to the fold line in the middle.


5.  Unfold, then refold "hotdog" style.  See the hole that you created with your cut?


6.  Using a 2 1/2" circle punch, punch in each of the four center sections.  If you slide your punch all the way, it will be in the perfect spot.  I always turn my punch over so that I can see exactly where the hole is going to be; it makes for easier centering, I think.  I'm sure you'll come up with something to use those 2 1/2" circles for......don't want to waste them!  Your luminary is starting to take shape now.


7.  Cut four squares out of vellum, 2 7/8" x 2 7/8", and glue them over the cut out circles on what will be the inside of your luminary.  I used the a glue stick by Stampin' Up! (Mine is an old one; the label on the new one looks different.)  **See note below**


8.  Make sure the glue around the vellum is dry, then glue the two short sides together, and fold your luminary.  If you "push" the two sides together slightly, it will help open up the center section.


9.  The next step is to decorate your luminary any way you want to!!  Pretty easy, huh?


10.  Place one of those little battery operated tea candles inside your luminary to get the effect of a candle (without burning your project up!).  I found these babies at the Dollar Tree - 2/$1.00.  Gotta love the dollar stores.


**Note**
I stamped on my vellum squares with Staz-on ink before gluing them onto the luminary.  It just gives another aspect of fun!!

I hope you try this project. It's fun & easy, and can be made for any holiday or occasion.  I'll list the supplies that I used for the instructions below; all Stampin' Up! products.  

Stampin' Trimmer  #126889
Simply Scored Scoring Tool (stylus & place markers included)  #122334
Bone Folder  #102300
2 1/2" Circle Punch  #120906
Craft Scissors  #108360
Stampin' Glue Sticks  #130654
Real Red Cardstock  #102482
White Vellum  #101856

Thanks for stopping by.......

Hugs, 
Nancy

Wednesday, October 8, 2014

More About Camp One Way

I wanted to share with you the cute little gift tags I made for the second "Swap" at Camp One Way.  We were to make two of the same tag - again for 21 people - so that's 42 tags!  I decided to go with something that I thought would be quick and easy since I had so many to make.  As with the gift card holders, some of my supplies arrived the day before we left for the event, so I had to drag that stuff along also to finish the gift tags.  LOL - one day I WILL be better prepared for these things!!
Here is my little tag.

Isn't he just the cutest Rudolph??  I was buzzing around one of the craft stores in my town not too long ago, and saw those little bitty red pom-poms.  Oh, I am such a sucker for embellishments, and HAD TO HAVE THEM.  At the time, I had not decided on the tag I was going to make, but eventually, this is what they were used for.  I had the bells in my "stash of stuff".  Doesn't every crafter have a  stash??  So, I thought they would add a nice little festive touch to the tag.

Here is my work station at Camp One Way, as I was slaving away on Rudolph.

I have all of my necessities close at hand, as you can see.  iPad in the lower right corner; iPhone dead center, and the yummiest sweet tea in the upper right.  Well, can I just tell you that by the time I finished, I was pretty sick of that Red Nosed Reindeer!!  LOL


Rudolph was punched using the Owl Punch (legs were cut off the owl), and each of his little eye balls & pupils were also from that punch.  THEN, they were all glued to the tag which had been punched with the Scalloped Tag Topper Punch.  The antlers were hand drawn.  I used a cute patterned paper from one of the holiday Designer Paper Packs along the bottom, and both red & white ribbon at the top of the tag.  The little bells were tied on with linen thread.  

Here is the entire "herd".

They really are cute - but I don't want to make that many ever again!!  LOL

Below is a list of products used:
  • Whisper White card stock  100730
  • Early Espresso card stock  119686
  • Basic Black card stock  121045
  • Trim the Tree Designer Series Paper Stack  135824
  • Real Red 1/4" Cotton Ribbon  134563
  • Whisper White 1/4" Cotton Ribbon  134567
  • Linen Thread  104199
  • Owl Builder Punch  118074
  • Scalloped Tag Topper  133324  
  • Early Espresso Stampin' Write Marker  119680
  • Mini pom-poms
  • Mini bells

Tuesday, October 7, 2014

This Week's Stampin' Up! Deals


Take a look at the deals available this week.  I love so many of the Stampin' Up! products, and I must admit that I already have five of the deals listed!!  LOL  I  wish I'd gotten them at these great prices.  Take advantage of the weekly specials - it's a great way to beef up your stash - on a budget!!

133158s
$29.95
$22.46
131267s
$15.95
$11.96

Order these by going to my website here.  It's quick & easy.

It's Time......

Yep - it's time for me to get back to blogging.  Why?  Basically, I miss it.  I enjoyed blogging when I first started, and felt I had a lot to share.  So what happened?  Life, I guess.  Too many things came up that I put in front of my blogging time, and I haven't posted in a L O N G time.  So, where to start????

How about this........I recently spent a long weekend with a wonderful group of Stampin' Up! Demonstrators at a place our Stampin' Up! group (all under Kim Peck's Impeckable Stampers in some way), have gone to for several years now.  We were on a retreat at a little place called "Camp One Way",  a Christian Camp in Illinois - kinda out in the sticks.  What did we do?  We had a GREAT time stamping, crafting, talking, eating and......not much else except maybe relaxing.  The event was coordinated by one of our group, Cathy Roy, and she did a marvelous job.

We each had a table of our own to work on, and lay out all our supplies & tools.  This is what Cathy had made for each of us, and placed on our tables.  It's a cookie shaped and decorated like a painter's palette!  The tag is made with a stamp set that is ONE OF MY FAVORITE sets - Work of Art.  It's so cute I haven't been able to bring myself to eat it yet!  

Here's a better look at the cookie with the tag out of the way.  Isn't it too cute??

We had several activities over the weekend; two of which were "Swaps".  If you haven't been in a Swap, you've missed out on a great time.  To participate in a Swap, you make a specific number of the same item, and basically "swap" one of your items, with other people who have also made like items (an example could be a card).  Often there is a theme, and always "rules" to follow.  We knew ahead of time how many people were participating in the Swaps (20), so we knew how many items to make.  Our first Swap was "Gift Card Holders".  The rules to follow:  use only current Stampin' Up! products.  Pretty easy, right?  Well, it would have been except that I didn't order some of the supplies I wanted to use in a timely manner.  So.......they arrived via UPS (love that brown truck) the day before we left for the retreat!!!  YIKES!!  Since I had to work 12 hours the day before we left,  I was too pooped that night to work on anything, and had to drag my stuff with me to the retreat to get my Swaps finished in time!!  But - I did get them done, and they turned out cute.  

My Gift Card Holder is a travel coffee cup!  When you pull up the lid, you can attach your gift card to the brown "coffee" with a little bit of sticky strip.  If you don't drink coffee, just pretend it's hot chocolate. 

I thought the stamp was appropriate since we obviously have moved into fall here in the Midwest!

And here is the entire group of my gift card holders - I actually made a couple extras.  All finished, packaged and ready to swap!!


I found the instructions for this cute gift card holder on Lori Hellig's blog.  The supplies I used are all current Stampin' Up! products (except the wooden craft sticks, and the lips):
  • Project Life Holiday Cheer Photopolymer stamp set - 135188
  • Whisper White card stock - 100730
  • Early Espresso card stock - 119686
  • Cherry Cobbler card stock - 119685
  • "Trim the Tree" Designer Series Paper Stack (Holiday Catalog) - 135824
  • Mossy Meadow 3/8" Stitched Satin Ribbon - 133670
  • Label Bracket punch - 132153   
  • 1 1/4" Circle punch - 119861
  • 1 3/8" Circle punch - 119860
  • Cherry Cobbler Classic Stampin' Pad - 126966 
  • Corner Rounder - 135346
  • Sticky Strip - 104294
  • Mini Craft Sticks - from my local craft store
  • Lips - cupcake picks found in the clearance aisle of same craft store (whole pack was $0.47!)
You can order all of the Stampin' Up! items here on my website.  

Well, thanks for joining me, and watch for more blog entries - really soon, where I'll share more of our fun Stampin' Up! retreat.

What Is Your Favorite Comfort Food??

There is nothing like a rainy, cool autumn day to make me crave a favorite comfort food from my childhood.  We have certainly moved into the fall of the year - it came so quickly - and we have had enough rainy cool days already!  My hubby and I were trying to decide what to have for dinner recently when all of a sudden, "goulash" popped into my mind.  Not the Hungarian Goulash with mushrooms, beef chuck and Hungarian paprika, but good ol' American Goulash - the kind mom used to make (I found out she got the recipe from her mom).


When I was a kid, I thought this was a family recipe because I'd never had it at anyone else's house.  Later, w\hen I lived in Indianapolis, they made chili that looked a lot like our goulash, but of course the spices were different (who puts elbow mac in chili??).  So - I must say that when I researched this delicious, quick and easy meal, I was totally surprised to find several recipes - very similar to mine - on where else, but Pinterest!! LOL

You can see from the ingredients list below the reason it is such an easy recipe - there is hardly any work, so prep time is a snap.  I chopped my onion & bell pepper, and added a couple of fresh chopped tomatoes I had left from my dear friend, Sandy's garden.  That was the most work!!  REALLY!!


Here is the basic recipe, and you can add whatever you like to it (like Sandy's fresh maters).

1# ground beef
1/2 large onion, chopped
1/2 large green bell pepper, chopped
2 large garlic cloves, minced
1-2 cups of water
28 oz. can diced tomatoes
2 cans light red kidney beans
1 tsp sugar
2 TBSP Italian seasoning (or oregano)
2 tsp dried basil
salt & pepper to taste
1# box elbow macaroni, uncooked

1. Brown your beef, stirring to break it up well in a skillet, then add the onion & bell pepper, cooking until the onions are translucent.  Put this in a pre-heated slow cooker that is on high.
2. Stir in everything else except the elbow mac, and cook on high for about 20 minutes.
3. Add the macaroni and continue cooking until the macaroni is al dente. You may need to add more water, which may result in the need to add more salt & pepper.
4.  Have your hubby taste it a few times (or you can) during the cooking process, to make sure your seasonings are right.
5.  You can serve it when done, but if you refrigerate it overnight........YUM - the flavors get a chance to blend.

This is what I call Comfort Food!

Wednesday, October 1, 2014

Stampin' Up! Deals

Stamp-Stock & Save

Click here to see the Stamp Sets, Card Stock, Ink Pads and Envelopes on sale starting Wednesday October 1st thru the 6th ...don't miss out on this...it's great deal on basic supplies! 

and....

   Weekly Deals!


Shop at my online store here for all of these and more...

There is also a special for the month of October.  When you hostess a workshop or if you have a "Book Party" for $300 or more....not only do you get the Hostess Benefits, but you also get a great stamp set for
FREE called "Good Greetings" - it's exclusive to Hostesses, and is a FABULOUS word set!!

...and if that's not enough....we've got a Special going on if you join Stampin' Up!!

Have you ever thought you wanted to do this either for a Hobby or as a Business?  Want to get a discount on your stamping needs or just want to make a little extra $$?  Why not give it a try?  What have you got to lose?  You get business supplies and $150 of Product for only $99!!!! 

....and if you sign up in the month of October you will receive a Pack of Designer Paper FREE every month for six months. Your first FREE paper will arrive in November. WHAT??How awesome is that??? 

I'd love to have you join my team.  All you have to do it go to my website and sign up. It's fast, easy and fun! 

Thanks for visiting.............